How to Mix Custom Paint Colors: 5 Essential Tips
How to mix custom paint colors is a creative journey that empowers you to tailor your surroundings to match your unique vision. Whether you’re refreshing your living space or starting on a DIY project, mastering the art of color mixing allows you to personalize your environment without compromising your style. To begin, here’s a short guide:
- Choose Your Base Color: Start with the main shade closest to your desired hue.
- Gather Sample Cans: Use smaller samples to avoid waste.
- Experiment with Additives: Adjust lightness or darkness with white or black paint.
- Test and Adjust: Dry a sample on a primed surface for accuracy, and adjust as needed.
The helpful team at Lowcountry Ace, with their extensive experience and expertise, is here to make your custom paint color journey smooth and rewarding. Our passion for creativity, combined with strategic guidance, ensures that anyone can achieve their perfect paint mix. Let’s dive deeper into the fascinating world of color mixing together.
Understanding Color Basics
Before you can mix custom paint colors, it’s crucial to grasp the basics of color theory. This knowledge forms the foundation for creating the perfect shade for your projects.
Primary Colors
In painting, the true primary colors aren’t what you might expect. While many of us grew up learning that red, yellow, and blue are the primary colors, the real primaries that can’t be mixed from other colors are cyan, magenta, and yellow. These are the same hues used in printing because they can create a full spectrum of colors when combined.
Here’s a quick breakdown:
- Cyan + Magenta = Blue
- Cyan + Yellow = Green
- Magenta + Yellow = Red
- Cyan + Magenta + Yellow = Black
Secondary Colors
Secondary colors are created by mixing two primary colors. This is where your creativity starts to flourish, as you explore the endless possibilities of color combinations. For instance:
- Blue (Cyan + Magenta) + Yellow = Green
- Red (Magenta + Yellow) + Blue = Violet
- Yellow + Blue = Green
These combinations will be your toolkit for crafting unique and vibrant hues.
The Color Wheel
The color wheel is a visual representation of colors arranged according to their chromatic relationship. It helps you understand how different colors interact and blend. By using a color wheel, you can easily identify complementary colors (colors opposite each other on the wheel) and analogous colors (colors next to each other on the wheel).
Tip: A color wheel is a handy reference for both beginners and seasoned painters. It guides you in choosing color schemes that are harmonious and visually appealing.
Understanding these basics will set the stage for your color mixing journey, making it easier to achieve the perfect shade for your project. Now that you have a solid foundation, let’s explore the techniques for mixing your custom paint colors.
How to Mix Custom Paint Colors
Creating your own custom paint colors can be a fun and rewarding process. It allows you to personalize your space and achieve the exact color you envision for your project. Here’s how to get started.
Choosing Your Base Color
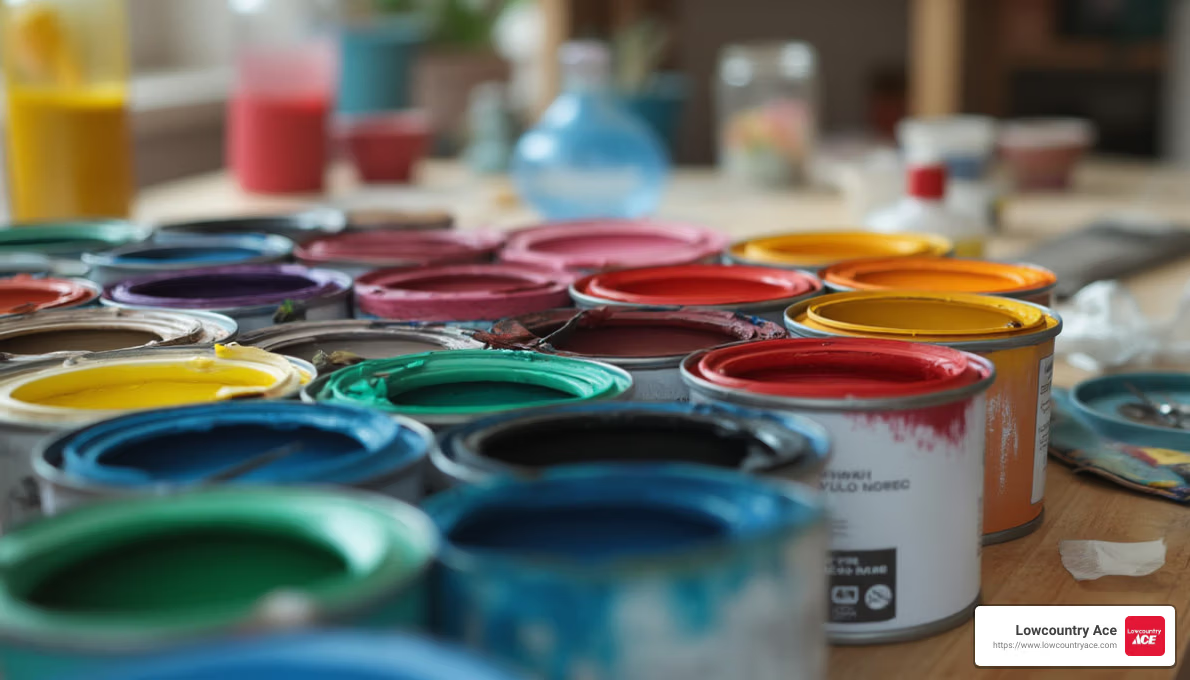
The first step in mixing custom paint colors is selecting your main base color. Visit your local paint store and pick up a few sample cans. These are small, inexpensive containers that let you test colors without committing to a large quantity. Choose a shade that closely matches the color you have in mind.
Sample cans are ideal because they offer a variety of hues, allowing you to experiment without spending too much. If you’re unsure, ask the helpful team at Lowcountry Ace for guidance. They can assist in matching colors and provide advice on selecting a base that suits your needs.
Experimenting with Additives
Once you have your base color, it’s time to experiment with additives like black and white paint. These are essential for adjusting the shade to your liking.
Start by pouring about half a cup of your base color into a small container. Then, gradually add black paint to darken or white paint to lighten the shade. Remember to add in measurable increments, such as teaspoons, to keep track of your adjustments. This precision ensures that you can replicate the color if needed.
Pro Tip: Always test your mix by applying a small amount to a primed surface and letting it dry. Paint often dries darker, so it’s important to see the final result before making a large batch.
By carefully choosing your base color and experimenting with additives, you can create a custom paint color that’s perfect for your project. Keep track of your proportions to ensure consistency, and don’t hesitate to seek advice from the knowledgeable staff at Lowcountry Ace.
Next, we’ll explore techniques for achieving the perfect shade and how to test your custom mix effectively.
Techniques for Achieving the Perfect Shade
Creating the perfect custom paint color doesn’t stop at mixing. Achieving the right shade involves careful testing and consideration of your space’s lighting. Here’s how you can ensure your custom color is just right.
Testing Your Custom Mix
Testing is key to getting your custom paint color just right. Once you’ve mixed your paint, see how it looks when dry. Paint often dries darker than it appears when wet, so this step is crucial.
-
Use a Primed Surface: Apply a small amount of your custom mix to a primed surface, like a paint stir stick. Primer helps the color sit on the surface properly, ensuring a true representation of the final shade.
-
Allow for Drying: Let the paint dry completely. This gives you a clear view of the color in its final state. It’s a simple step but makes a big difference in matching the desired shade.
-
Evaluate the Sheen: The sheen of your paint can affect the final appearance. Higher gloss finishes reflect more light and can make colors appear lighter, while matte finishes absorb light, giving a softer look.
Adjusting for Light and Space
Your room’s lighting can significantly impact how a color looks. Consider these factors to ensure the perfect shade:
-
Natural Light: Rooms with ample natural light can make colors appear brighter. If your space has lots of windows, test your paint during the day to see the full effect.
-
Room Lighting: Artificial lighting can alter the perception of color. Try testing your paint under different lighting conditions, such as during the evening or with lamps on, to see how it changes.
-
Space Functionality: Think about how the room is used. For example, a cozy living room might benefit from warmer tones, while a bright kitchen might look best with cooler shades.
By carefully testing your custom mix and considering the lighting in your space, you can achieve the perfect shade for your project. The helpful team at Lowcountry Ace is always available to offer advice and tips on achieving the best results with your custom paint colors.
Next, we’ll look at common mistakes to avoid when mixing paint colors and how to ensure your project goes smoothly.
Common Mistakes and How to Avoid Them
Mixing custom paint colors can be a fun and rewarding project, but it’s easy to make mistakes that can lead to disappointing results. Here are some common pitfalls and how to steer clear of them.
Latex vs. Oil Paint
One of the most frequent mistakes is mixing latex and oil paints together. These two types of paint have different bases and won’t mix well. Latex paint is water-based, while oil paint is solvent-based. Mixing them can result in a lumpy texture and poor adhesion.
How to Avoid: Stick to one type of paint for your project. If you’re using latex, only mix with other latex paints. The same goes for oil paint. This ensures a smooth, even finish.
Mixing Finishes
Another common error is mixing different paint finishes, like combining matte with gloss. This can lead to an uneven sheen and unexpected results once the paint dries.
How to Avoid: Choose a finish that matches your project’s needs and stick with it. If you want a glossy look, use all gloss paints. If you prefer a matte finish, make sure all your paints are matte. Consistency is key to achieving a uniform look.
Testing Colors
Skipping the testing phase is a mistake that can lead to a color that looks different than expected once it’s on the wall.
How to Avoid: Always test your custom paint mix on a primed surface. This step allows you to see how the color will look when dry and under different lighting conditions. It also helps you adjust the mix before committing to a larger area.
Pro Tip: Use a paint stir stick or a small piece of primed wood for testing. Let the paint dry completely before making any decisions about adjustments.
By being mindful of these common mistakes, you can ensure your custom paint project goes smoothly. If you have any questions or need guidance, the helpful team at Lowcountry Ace is always ready to assist you.
Next, we’ll dive into some frequently asked questions about mixing paint colors and provide answers to help you on your DIY journey.
Frequently Asked Questions about Mixing Paint Colors
How do I mix paint to make different colors?
Mixing paint to create new colors is like cooking—it’s all about the right ingredients and proportions. Start with sample cans of your main base color. Add small amounts of other colors using an eyedropper tool or teaspoon to ensure precision. For example, if you want to darken a shade, add black paint in tiny increments. To lighten it, use white. Always keep track of your proportions so you can replicate the mix if needed.
A color palette can help you visualize the combinations. Arrange your colors from lightest to darkest, and experiment by mixing adjacent colors. The primary colors—red, blue, and yellow—are the foundation for creating any color.
What should I do if my paint dries darker?
It’s common for paint to dry a shade darker than expected. This happens because wet paint reflects more light, making it appear lighter. Once it dries, the color deepens.
How to Handle It: Always test your paint mix on a primed surface before committing to a large area. A primed surface prevents the paint from being absorbed unevenly, which can alter the final color. Let the test area dry completely to see the true color. If it dries too dark, you can adjust by adding more white to your mix.
Can I mix different brands of paint?
Mixing different brands of paint can be tricky. Each brand may use different formulas, which can affect the consistency and finish of your paint. However, it’s not impossible.
Guidelines for Mixing: Stick to paints with the same base (latex or oil) and similar finishes. This minimizes the risk of uneven texture or sheen. If you’re unsure, test a small batch first. Mixing guidelines suggest starting with small amounts to ensure compatibility. If the consistency and finish look good, you can proceed with a larger mix.
By understanding these aspects of how to mix custom paint colors, you’ll be better prepared to tackle your project with confidence. If you have further questions, the team at Lowcountry Ace is here to help guide you through your DIY journey.
Conclusion
At Lowcountry Ace, we believe in empowering our community to take on their DIY projects with confidence. Our expert team is always ready to assist you in your journey to create the perfect custom paint color for any project. We pride ourselves on providing excellent customer service and ensuring that your painting experience is both enjoyable and successful.
Local convenience is at the heart of what we do. Located on James Island, our store is easily accessible for residents in the surrounding areas, including Folly Beach. We offer a wide range of products and services, and our home delivery option ensures that you can get everything you need without leaving the comfort of your home.
Whether you’re looking for advice on mixing paint colors, choosing the right finish, or finding the perfect tools for your project, our team at Lowcountry Ace is here to help. We invite you to visit us and explore our offerings, including our custom paint mixing services. Together, let’s bring your creative vision to life.
Lowcountry Ace Hardware: Your one-stop shop for home improvement. We offer quality products from trusted brands and expert advice from our experienced staff. Located on James Island, visit us for tools, hardware, fishing gear, power tools, building materials, grills & smokers, electrical and plumbing supplies, and more.


